How to install an MCP App — Claude
Connect a 3DScribe scene to Claude in about two minutes. One URL, no SDK, no install — then ask Claude about any part of your product and see it on screen.
A 3DScribe scene is your CAD model turned into something an AI assistant can actually answer questions from. The MCP connector puts that scene inside Claude, so you can ask about any part of your product and get a real answer — with the model on screen, not a description of it.
There is nothing to install and no SDK to build against. You paste one URL into Claude’s connector settings, and from that moment Claude can look up parts, explain what they do, show them from any angle, and walk someone through a repair.

Before you start
A Claude account with access to Connectors. Connector support varies by plan; if you don’t see the Connectors screen described below, check your plan or ask your workspace admin.
A 3DScribe scene that has finished processing. A scene still analysing won’t serve a connector yet — check its status in Studio.
The scene’s connector URL, which you’ll copy in Step 1.
Every connection authenticates. There is no anonymous access to a 3DScribe connector — whoever adds it will be asked to sign in.
Step 1 — Copy the connector URL
Open the scene in 3DScribe Studio and find its MCP connector URL. This is the only piece of information Claude needs.
Step 1 — the scene's connector URL in 3DScribe Studio. This is the only thing Claude needs.
The URL looks like https://mcp.3dscribe.com/s/your-scene-id. Copy the whole thing.
Step 2 — Open Connector settings in Claude
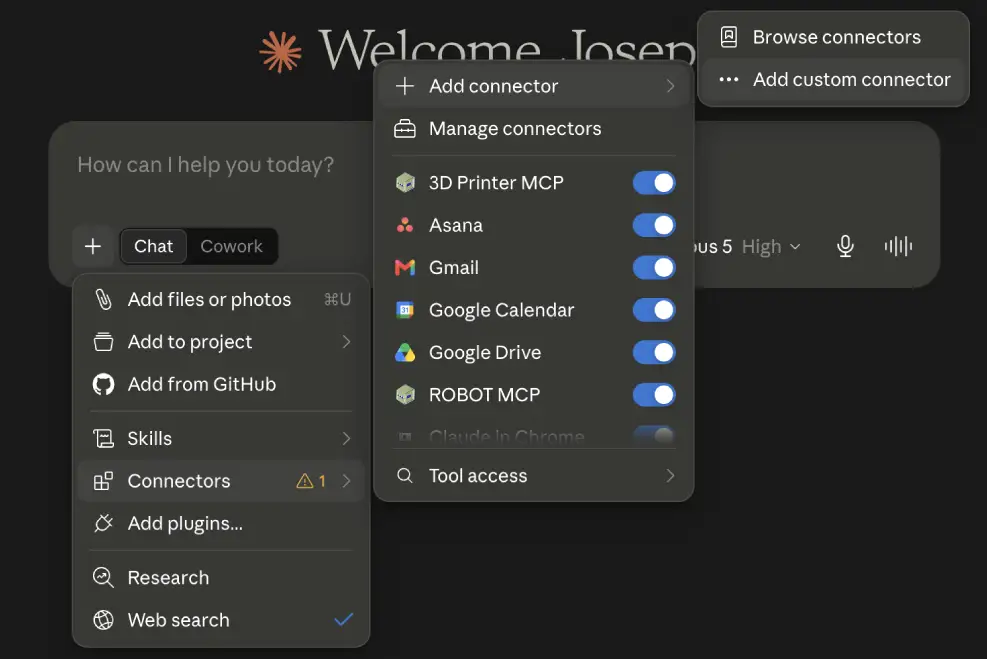
In Claude, go to Settings and open the Connectors section. This is where Claude manages every external tool it can reach.
Step 2 — Settings → Connectors is where Claude manages every external tool it can reach.
Step 3 — Add a custom connector
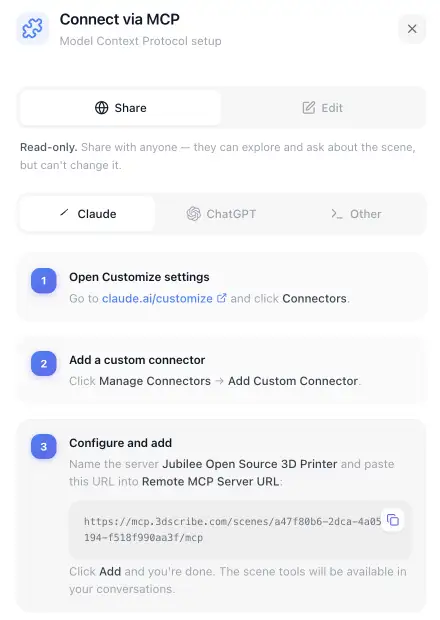
Choose the option to add a custom connector, paste the URL from Step 1, and confirm. Claude will contact the scene and read back the tools it offers.

Step 3 — paste the connector URL into the custom connector dialog and confirm.
Give it a name you’ll recognise later — the product or scene name works well, especially if you plan to connect more than one scene.
Step 4 — Sign in and approve access
Claude will send you through a sign-in step. Approve the connection, and the connector becomes available in your conversations.
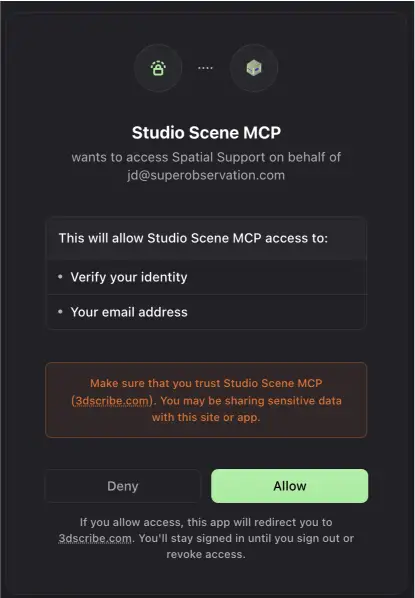
Step 4 — approving the connection. Every connection authenticates; there is no anonymous access.
Step 5 — Check that it works
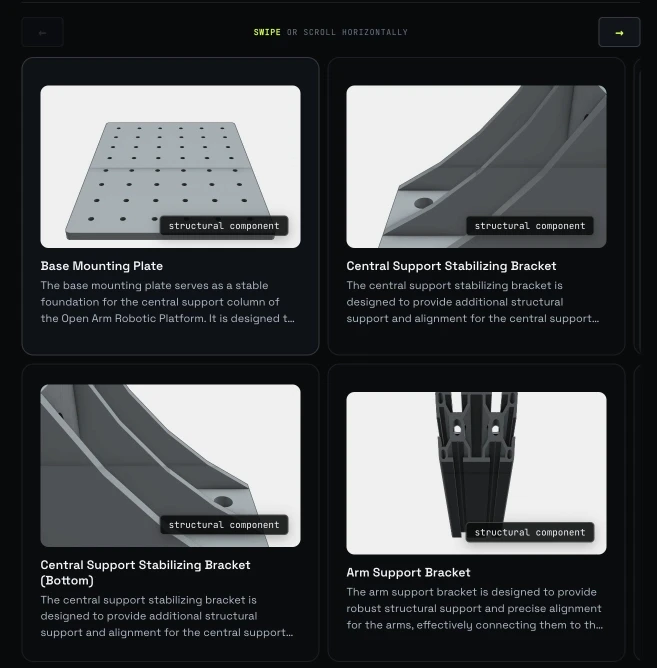
Start a new conversation and ask something concrete, like “Show me all the components in this scene.” Instead of a wall of text, Claude opens the component explorer — a real interface you can scroll, search, and filter by assembly, right in the conversation.

Step 5 — the component explorer opens inside the conversation. Scroll, search, and filter it without leaving Claude.
If that works, you’re connected. Everything below is what you can now do with it.
What you can ask for
The connector exposes 34 tools, but you don’t need to learn any of them — you ask in plain language and Claude picks. These are the kinds of questions it answers well:
“What’s this part?” Finds a component by name, function, material or description and opens a card with its photo, category and specs.
“Show me all the components.” An interactive catalog you can scroll, search, and filter by assembly.
“Where does it sit in the machine?” Highlights the part in context and spins a 360° turntable of just that assembly.
“How big is it?” A dimensioned diagram with real measurements pulled from the model geometry.
“What touches it?” Spatial analysis — contacts, neighbours, and what has to come off first.
“Walk me through the repair.” A step-by-step guided tour with the camera moving to each step.
“Show me one in brushed steel.” Generates a render of the part in a described finish.
“What does the manual say about X?” Searches the documentation attached to the scene.
A dimensioned diagram with real measurements, and the same component highlighted in context.
Answers are interfaces, not paragraphs
Nine of the connector’s responses open a real interface inside the conversation rather than returning text: the scene overview, component explorer, assembly explorer, dimensioned diagrams, render gallery, tour navigator, animation player, knowledge base, and image viewer. You can scroll them, search them, and click through them without leaving Claude.
Ask concretely
The connector is at its best with specific references — a part by name, an assembly, a procedure. Questions grounded in the model (“how does the pump come apart?”) land better than open-ended diagnosis (“what would cause a rattle?”), which asks the assistant to speculate beyond what the scene actually contains.
Who can see your scene
Access is set per scene, and it’s worth being precise about what the two settings mean:
Public means any signed-in account can connect. It does not mean anonymous — there is no anonymous access to a 3DScribe connector.
Private means the connection is checked against your organisation’s membership. Only members can connect.
Alongside that, you can switch off whole capability groups per organisation — so a customer-facing connector can offer browsing and guided tours without exposing render generation. Media is served through signed, expiring URLs; nothing in a scene sits in a public bucket.
Public vs private is about which accounts can connect, not about whether there is a login. Every connection authenticates.
Troubleshooting
The connector doesn’t appear in a conversation
Start a new conversation after adding it — existing threads don’t always pick up a newly added connector. If it still doesn’t appear, reopen Settings and confirm the connector shows as connected rather than pending approval.
You’re asked to sign in repeatedly
The approval didn’t complete. Remove the connector, add it again, and finish the sign-in step in the window Claude opens rather than in a separate tab.
“Not authorized” on a scene you can open in Studio
The scene is private and the account you signed into Claude with isn’t a member of the owning organisation. Either sign in with that account, or ask an admin to add you.
Nothing renders, or images fail to load
Scene media uses signed URLs that expire. If a conversation has been open a long time, ask the question again to get fresh links.
Connecting more than one scene
Each scene is its own connector. Add them the same way and give each a name matching the product, so Claude can tell them apart when you ask about a specific machine.
What’s next
Install the same connector in ChatGPT — the steps differ only in where the settings live.
Give the connector to a customer or a field technician and see what they ask for.
Set up a creator connector, which adds eight more tools for editing and publishing scenes from the assistant.
NEXT STEP
Connect the same scene to ChatGPT
One connector URL works in any assistant that speaks MCP. Only the location of the settings changes.
Was this page helpful?
Yes
No